 noteboard
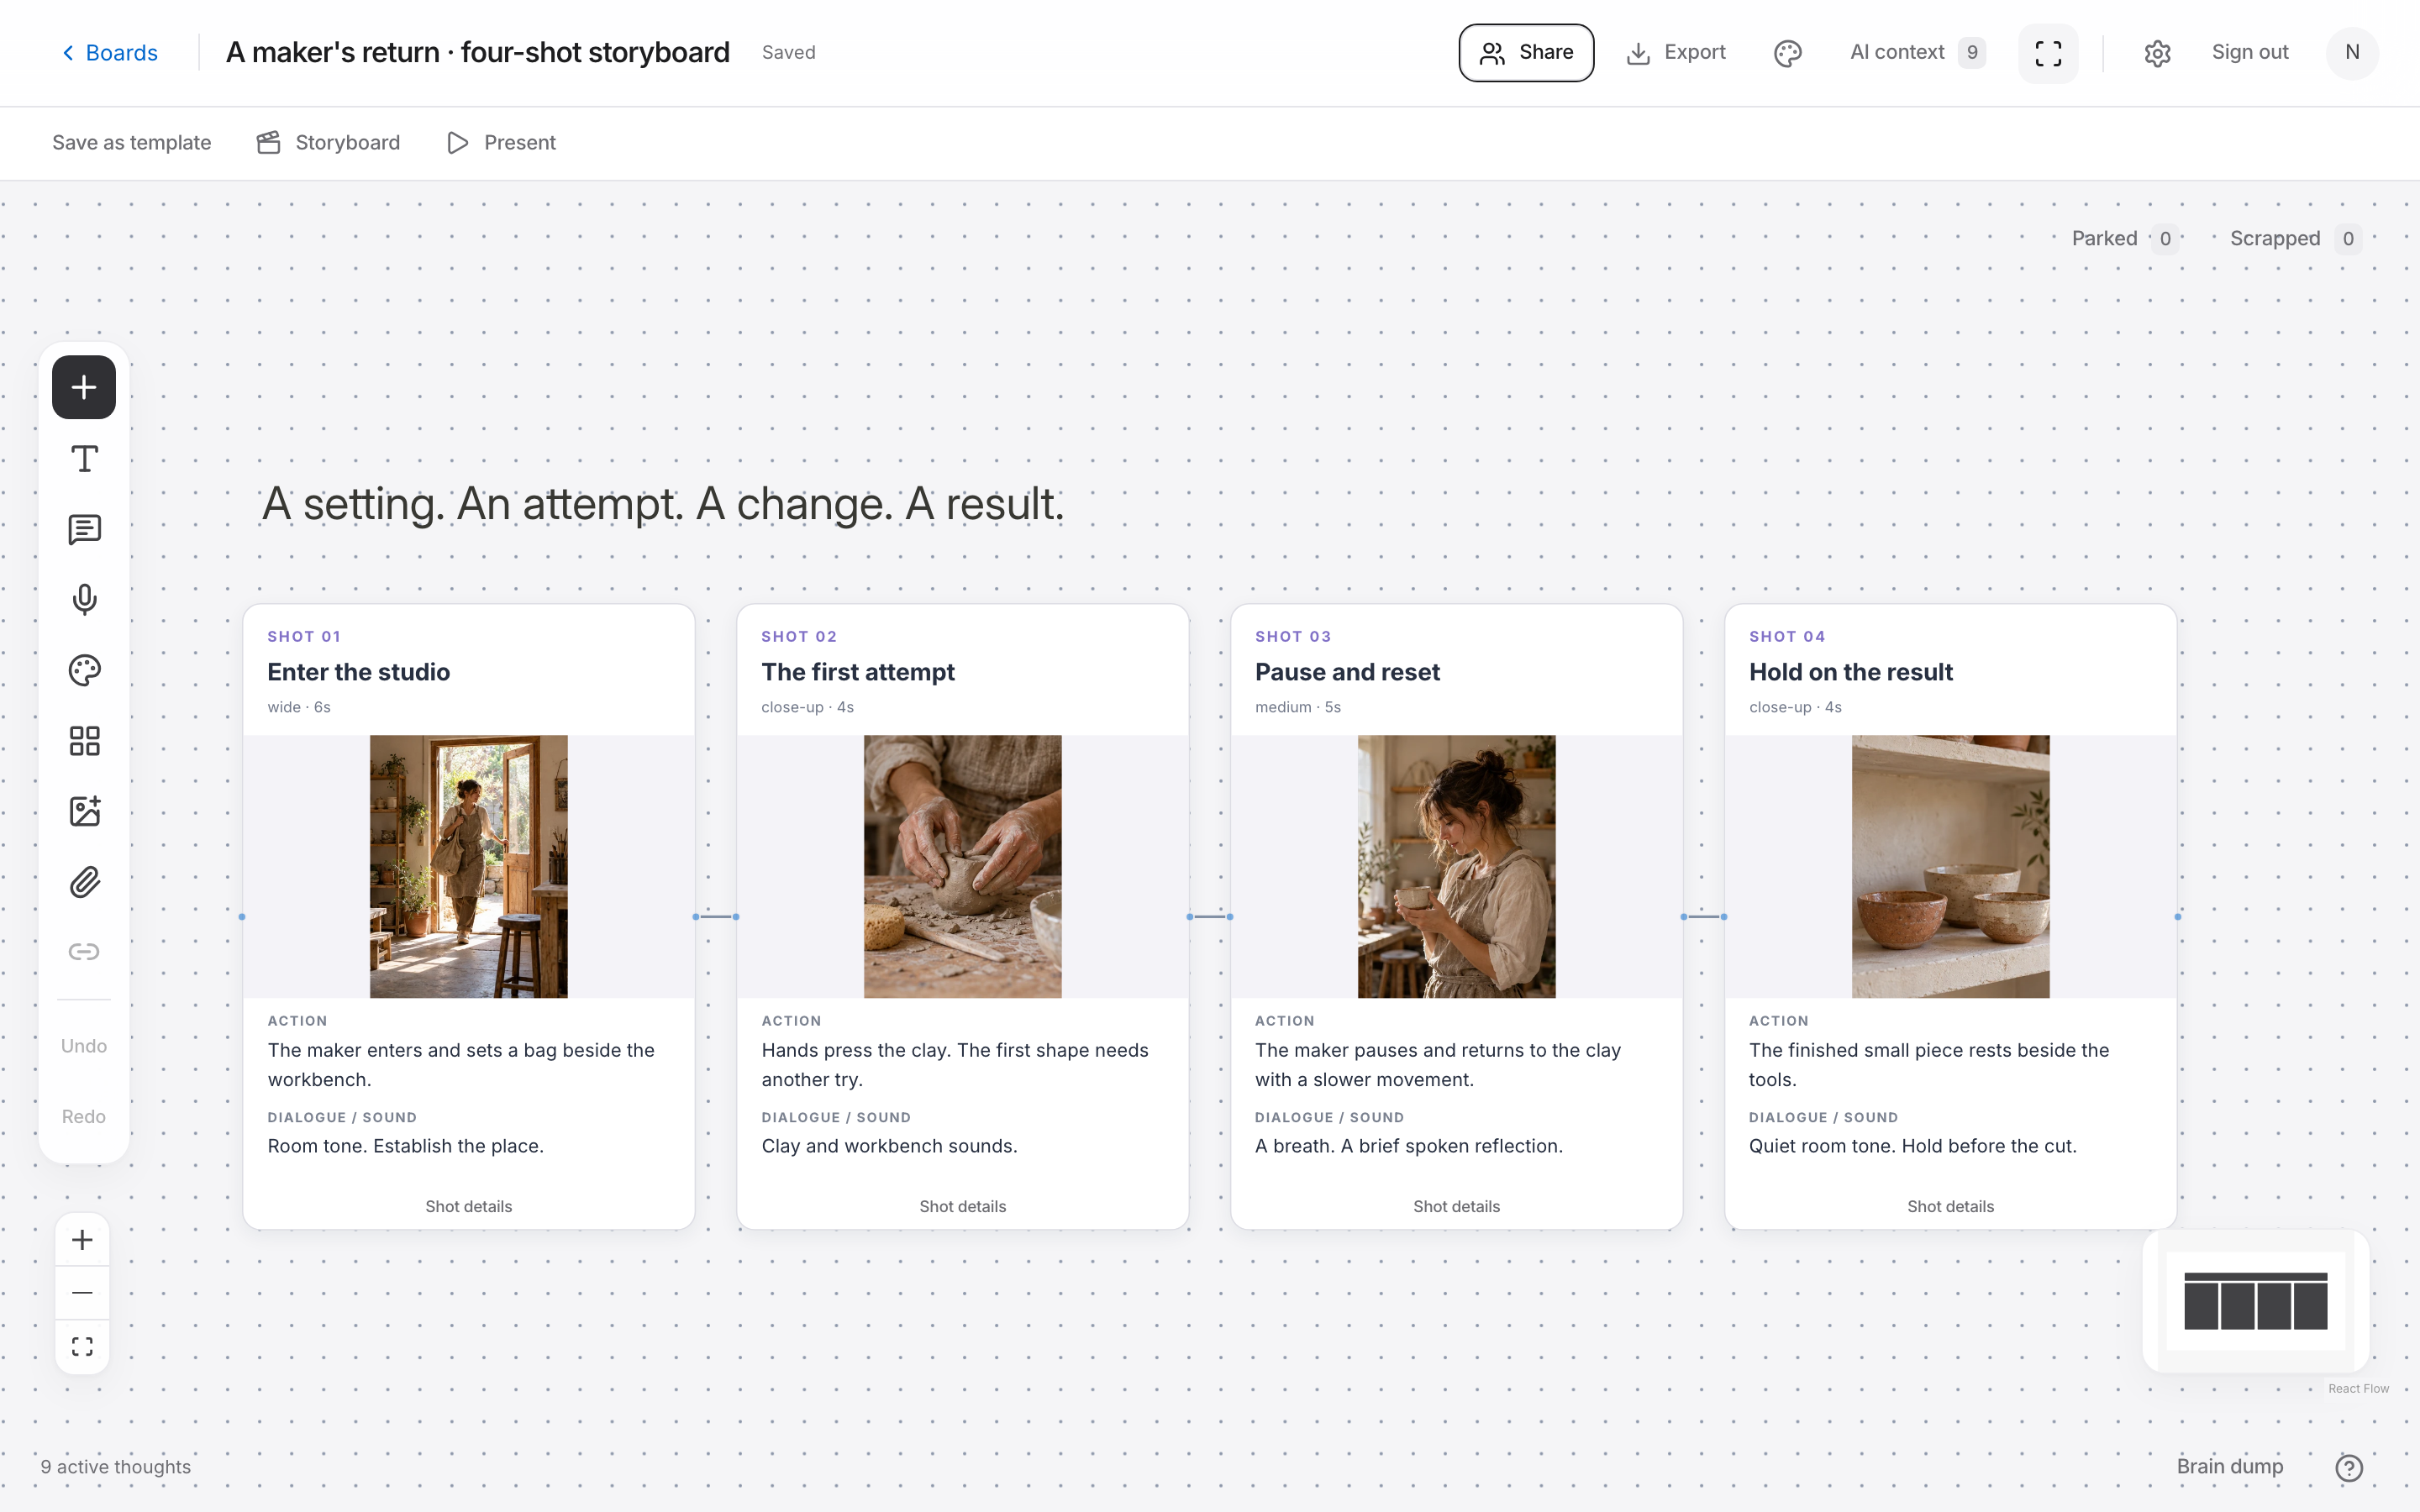
1. Break the script into visible story beats
Write what changes from the beginning to the end. For our fictional maker portrait, a person returns to ceramics after time away, struggles with the first attempt, adjusts their movement, and finishes a small piece. Those beats give the sequence a reason to progress.
Add the audience, format, and approximate running time. A short social video may need the activity to be clear quickly. A longer interview can spend more time establishing the person and the place. Note the requirements before deciding how many shots to plan.
Underline actions you can show. “The maker feels uncertain” needs a visible expression or behavior. A pause before touching the clay or a careful first movement gives you something to draw and discuss. Keep a line of dialogue when it adds information the image cannot explain on its own.
2. Make a frame for each shot
Give each shot a numbered frame. Use a rough sketch, a photograph, or a reference image to show the composition. A frame needs enough detail to explain where the person and important objects are; polished drawing can wait.
Write the shot size in ordinary production terms. A wide shot establishes the studio, a medium shot shows the maker working, and a close-up shows hands or the finished piece. Split a frame when the camera position or the main action changes enough to need another shot.
In Noteboard.ai, use storyboard frames to arrange the shots in order and place the notes beside the images. If you use a generated reference, check that the objects, actions, and continuity make sense for the shoot. It is a way to discuss a composition, not a record of what has already been filmed.
3. Add action, sound, and useful timing notes
Describe what happens during each shot. “Hands press the clay; the rim folds inward” tells the production more than “pottery close-up.” Add the important start and end positions when they affect the edit or the next shot.
Write what the viewer hears: room tone, tools, dialogue, music, or a deliberate pause. Mark sound that continues across a cut if it helps the sequence make sense. Only add a camera movement when it has a purpose you can explain.
Estimate duration when timing matters, and keep it labeled as an estimate. A shot of the finished object may need a hold so the viewer can read it. A rapid insert may need less time. You can revise these choices once you rehearse the action or begin editing.
4. Read the sequence before filming
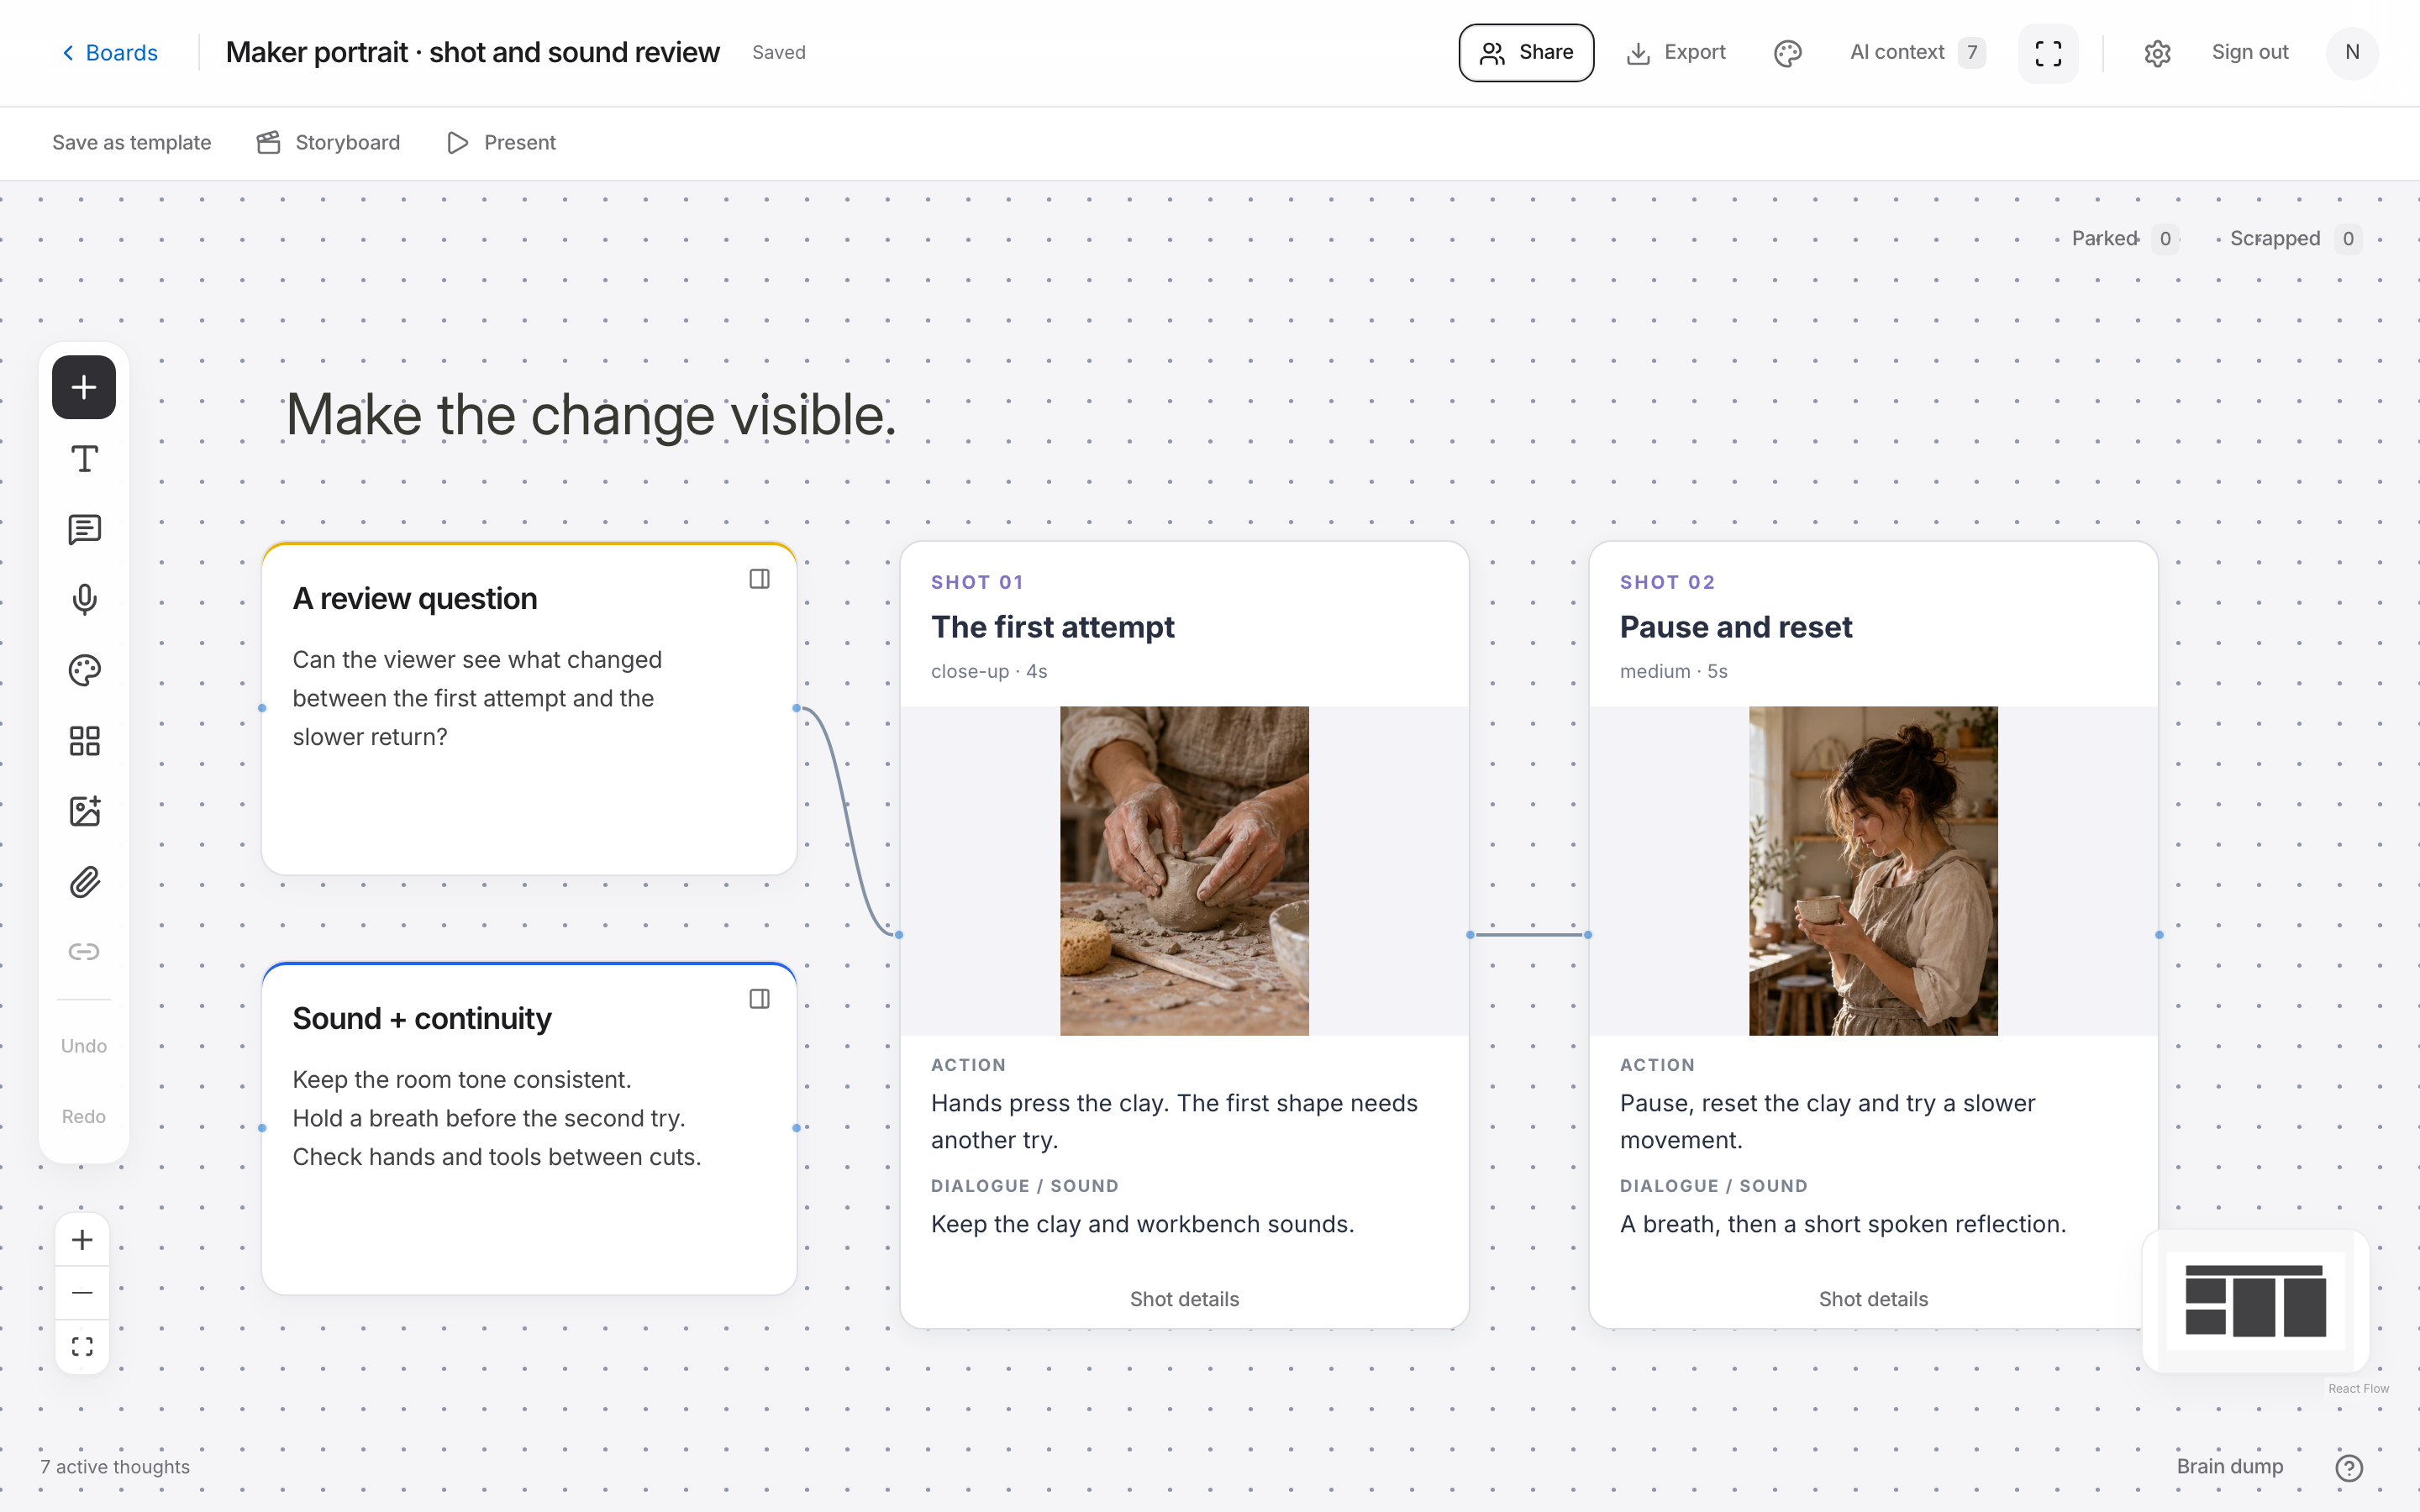
Go through the storyboard frames in their saved order. If you want slides for a review, use Build presentation from shots, then check the presentation frames after any shot changes. Ask someone who hasn't been planning the film to explain what happens. Their questions can show where a transition, action, or piece of context is missing.
Check continuity and practical requirements. Does the maker's position make sense from one shot to the next? Is the finished piece available for the final frame? Can the camera see the action without blocking the workspace? Record these questions beside the shot that depends on them.
Save the shot order, then share the board or use Export storyboard PDF for an ordered sequence with production notes. Keep the shot numbers consistent as you revise it. If you remove a shot, note what information was lost so the team can decide whether another frame needs to cover it.
Example: a four-shot maker portrait
These product boards show one way to move from the setting to a first attempt, an adjustment, and a finished piece. The frames and actions are fictional. Replace the references with sketches or images suited to your own script.
The table adds information the drawing can't carry by itself. Read the frame and the notes together when discussing the sequence with the person filming or appearing in it.
| Shot | Frame and action | Sound or timing |
|---|---|---|
| 01 / Wide | The maker enters the studio and sets a bag beside the workbench | Room tone; allow enough time to establish the place |
| 02 / Close-up | Hands press clay and the first shape collapses | Keep the clay and wheel sounds; show the change clearly |
| 03 / Medium | The maker pauses, resets the clay, and tries a slower movement | A short spoken line can explain what they changed |
| 04 / Close-up | The finished small piece rests beside the tools | Hold on the result before ending the sequence |
Use the storyboard to prepare the shot list
Once the sequence is clear, write a separate shot list with the shots you need to capture and the equipment, people, or props each requires. This is a planning step you complete yourself. You may film in a different order to make practical use of the location. Keep the storyboard as the reference for how those shots fit together in the final video.
When learning how to plan a video project, it helps to separate the story order from the shoot order. The first explains the viewing experience; the second helps the team organize the day. Link both to the same shot numbers.
An AI prompt for this workflow
Review these story beats. Where is the change unclear, which scene seems unnecessary, and what question should we answer before filming?
Do I need drawing skills to make a storyboard?
No. Simple sketches, photos, reference images, and clear notes can communicate a shot. Give each frame a purpose and explain the action, sound, and camera information the production needs.
Try this in Noteboard.ai
Begin with four editable storyboard frames, then add your own shot content, action, sound, and timing notes. Save the sequence before exporting the storyboard PDF.
Explore Storyboard maker